Tuesday 26 September 2017

Wedding Eustoma

Good morning everyone!


 Wedding is always important point in our lives so today I decided  to show  you something I've made recently.

When I was making this small flower arrangement I was thinking for something soft and delicate inspired from the monochrome vintage French style!

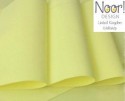
To achieve the ethereal texture of the flower petals, this time I used Zephyr Silk Foam.
It can be manipulate easily by using your hands without heat treatment or ironing. I was surprise how easy the petals can be rolled and shaped. The result was more than stunning :-)


 I chose pale purple and lime green because those colours are one of the most favorite from the brides, besides this, they bring sophisticated beauty.


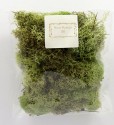
last finishing touches...I added some blossoms of a dogwood tree!


I hope you like my small bridal bouquet!
Thank you for visiting!

Elena xxx

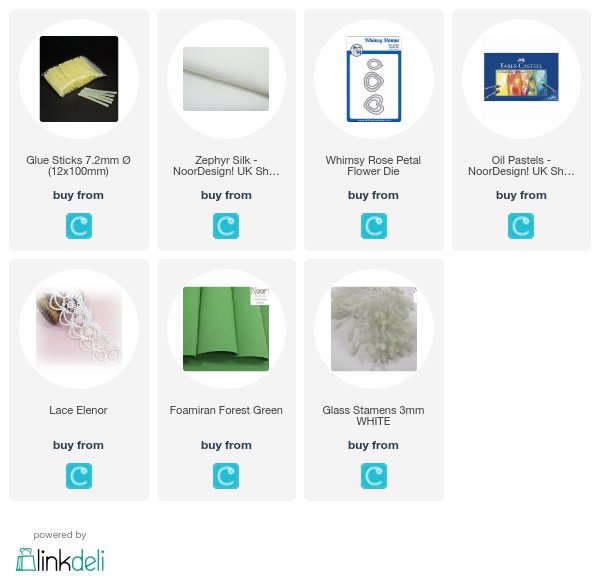
All used items you can find on https://www.crafteezee.co.uk/

Tuesday 19 September 2017

My Rose! Tutorial

Hello everyone!

“It is the time you have wasted for your rose that makes your rose so important.” Beautiful thought of a great author! 

Do you like roses? I adore them! Obviously  Antoine de Saint-Exupery love them as well :-)


Today my step-by-step photo tutorial is for easy foamiran rose using Whimsy Rose Petal Flower Die Set. 
All products used are from www.crafteezee.co.uk!
I started with cutting the petals out of white foamiran as it's shown on the picture. You can see that there are 4 layers of petals. 


My next step was colouring them using Faber-Castell Oil Pastels. I like the colours to be varied on my petals, so I used two shades for the top, 108 and 128, and 172 for the bottom. I don't cover the whole surface but leave the white spots and this contributes to the more natural looking of the flower. Those petals were coloured both sides.


Further, I warmed everyone to the iron , scrunched the top and the bottom of the petal and twisted it backwards and forwards a few times, rolling it between my fingers (pc. 1). I gently stretched the middle part of it trying not to touch the edge (pc. 2). To give shape to the smallest ones, I used one of the smallest ball of the Flower tools (pc. 3).


I took a piece of kitchen foil, crushed it to make a drop-shaped core with a size 1 cm x 1.5 cm. To be comfortable for working, I punched a small hollow and glued a toothpick at the bottom of the bud. 


Now was time to shape the rose bud! I stuck one of the smallest heart-shaped leaves (pc.1). Against the first one I stuck the second (pc.2) and the last two were placed stacking on to the first two (pc. 3 and pc. 4). In this way, I completely covered the foil core. 


The petals of the next three layers were arranged successively, one after another, as it shown on the photos.


 At last, I had this:


The last touch I added to my rose was rose sepals made from a square of olive green foamiran. I coloured their edges with an oil pastel 128, heated and twisted them in the way I explained above and stuck the calyx to the back side of my rose.


To finish my flower arrangement I added two rose buds and several leaves. It could be a wonderful decoration for a treasure box, an exploding box, a scrapbook album or just to decorate the wrist of some pretty lady :-)!


Thank you for coming around!

HUGS xxx


Tuesday 12 September 2017

Sunflowers Tutorial

Hello dear friends!

Elena is here! 

This is my first presentation as a DT member of Noor Design UK, so I'm really excited! I was over the moon when Tracy called and told me the great news :-))))! Thank you so much, Tracy, for the opportunity given! 


It was a wonderful sunny day today and I really want to believe we'll have more shiny days like this. I love the Indian summer that brings lots of colourful bright tones warmed by the last golden rays of the autumn sun!

For this reason, I decided to show you how to make a sunflower out of yellow plain foamiran.


There is step-by-step photo tutorial. Enjoy! :-)

You need a strip 20 cm x 7 cm long, yellow plain foamiran.
I cut it into 3 circles with diameters 6.5 cm x 2  and 5.8 cm x 1 (you can use circle cutting dies).


Then, I shaped them with scissors like that (to get this shape you can use Rosy Owl Flower Dies AC1):


Next, I coloured  the edges of the petals using Gallery by Mungyo oil pastel 206 (you can use Faber-Castell Oil Pastel Crayons 111) on both sides.

After that, I heated up the iron up to grade 2 (silk) and warmed the leaves each individually and twisted and rolled them one by one.


Now was time to make the centre. 

For it, I used Flower Centres 9mm. To make the flower centre more naturally I stuck an yellow stripe (10 cm x 1.5 cm) , which I coloured with oil pastels 206 and 235  (you can use Faber-Castell Oil Pastel Crayons 111 and 176) and cut short slits like this:


I heated it a few seconds...


... and I stuck it in to the plastic centre.


After gluing, I had this natural looking sunflower centre:


Everything was ready to assemble my foamiran flower. 

I glued the three layers by placing them overlapping:


... punched a hole in the centre of the flower and attached the stamen.

Voilà! :-)


Hope you like it!
See you soon!
Hugs! xxx

The products used can be ordered in the Noor! Design U.K. webshop:


Blue Extravaganza

 Hello dear friends! I am really into creating fabric flowers for card making and last few months my work is dedicated to this activity. The...